Showing posts with label vegan. Show all posts

Saturday, July 5, 2014

Kinda Healthy Homemade Bounty Bars

VG, GF, Raw


Sometimes in life you just want something a bit yummy. Tonight is the very last night of my daughter being 9 so I thought we'd have a little farewell to single digits dinner.  I found this recipe on my new roots and made a few tweaks to suit what I had in the pantry. We all enjoyed these after dinner and they were a huge hit. They'd make a lovely dessert with some ice cream too!

Ingredients:

For the filling:

1/4 C coconut oil, melted
2 Tbsp coconut butter *
1 Tbsp maple syrup
pinch salt
1 tsp pure vanilla extract
2 C desiccated coconut
1 Tbsp water

For the raw chocolate:

1/4 C coconut oil
2 Tbsp nutella or equivalent - we have a GF version low in sugar (or you can make your own)
1/3 C raw cacao powder
1/4 C raw honey
two pinches salt, to taste

In a double boiler melt the coconut oil and coconut butter together. Add the maple syrup, salt & vanilla. Remove from the heat and add the coconut and water. Mix together well.

Line a square baking tin with cling film and add the coconut mix. Press down firmly and pop in the freezer for at least 30 mins to set hard.

To make the chocolate put the coconut oil and nutella in a double boiler and melt together over a gentle heat. Remove from the heat and whisk in the raw cacao powder and honey then add the salt. Taste and adjust the sweet/salt if needed.

Get a baking rack and place it over a piece of baking paper. Make sure it's a rack that will fit in your freezer and that you have space to pop it in.

Take the coconut filling out of the freezer and turn out onto a board. Cut into bars or squares then dip in the chocolate. When covered remove with a fork then place onto the rack.

When you've done all of your pieces put the rack in the freezer and leave for a minimum of 30 mins.

Allow them to rest for about 5 mins before eating. They can be stored in a plastic container in the freezer for up to two months.


* Not to be confused with coconut oil, coconut butter is a thick white pure form of coconut fats that can be used to make coconut milk by adding water. I used it here because I have it in the pantry but if you don't have it, you could use normal butter or more maple syrup. Coconut butter is lovely and versatile in whole food baking, but she ain't cheap. The one I bought was close to $10 for a jar. It does give baking a rich coconut flavour though.

Wednesday, July 2, 2014

Vegan Gluten Free Lemon Blueberry Scones


VG, GF, Grain free

This afternoon I needed something nice and simple for afternoon tea so I thought I'd research some scone recipes. I've made scones using pumpkin or sweet potato before but today I felt like something sweet. This vegan GF lemon blueberry recipe hit the spot.

Ingredients:

2C almond meal
1C coconut flour
2 tsp baking powder
pinch salt
1 tsp mixed spice
1 teabag of herbal tea (the original recipe suggests chamomile, I used ginger and lemon)
1 heaped Tbsp coconut oil (solid, not melted)
1/2C brown sugar
zest and juice of 1/2 lemon
1 1/3C unsweetened milk of your choice (we used almond)
3/4C frozen blueberries

Preheat oven to 205 degrees C or 400 degrees F. Line a baking tray with baking paper.

In a food processor combine almond meal, coconut flour, baking powder, salt, mixed spice and tea. Whiz a few times until combined. Add the coconut oil and pulse until it has a crumbly texture.

In a separate bowl mix brown sugar, lemon zest and lemon juice then add to the flour mix. Combine well.

Add the milk and pulse until a dough comes together.  Carefully fold in the blueberries. Form into whatever shape you like and place on the tray. Bake for 19 - 22 minutes (mine took 22).

Here's a photo of the dough before it's cooked. I always find it useful to see the before photos of GF baking because sometimes it's difficult to believe that it really does work into a manageable dough. Here's the proof:


These are nice and crispy on the top and soft in the centre. The coconut flour does have quite a strong taste and if I make these again I'd consider substituting it for 1/2 C coconut flour and 1/2 C brown rice flour or tapioca starch. As usual with GF baking they're quite crumbly to eat - but yummy. Enjoy.


The original recipe came from www.thekitchn.com and I have made some changes which are reflected in the ingredients list above.

Monday, February 17, 2014

Gluten Free Vegan Seed Crackers

Anyone else totally sick of rice crackers?? I may have just the thing for you.


These seed crackers were a pleasant surprise. I've always shied away from making crackers because I don't have the best history with rolling out GF doughs. I imagined everything sticking and the crackers not holding together at the end. Amazingly, these crackers are so simple to make and they're just about fool proof. It's hard to find a good GF cracker especially if you're also needing them to be egg free.  We had these with cheese and chutney last night and then the kids had some in their lunches today with some homemade hummus. My kids aren't huge fans of seeds so the fact that they loved these felt a bit like a victory.

The recipe is from Wholefood Simply and I made it exactly as the recipe suggested, except that I omitted the vanilla and found I had to cook mine for longer to get them to go crispy. I think it was due to my tray not being large enough so they were a bit too thick.

Here's the recipe:

Preheat an oven to 175 degrees C or 350 degrees F

In a food processor put:

1/2 C chia seeds
1/2 C flax seeds
1/2 C pumpkin seeds
1/2 C sunflower seeds
1/4 tsp salt
1 tsp cinnamon

Pulse a few times to break up the seeds then add 1 C water.

Keep blending on a slow speed until the mix thickens up.

Line a tray with baking paper, spread the mix over the top thinly using a spatula. The recipe suggests using another piece of baking paper on top so you can roll it out but I didn't need to, I just used a spatula to spread it evenly.

Place in the oven for 30 mins and check if they're crispy. If they need more time put them back and check every 10 mins until they're nice and hard. Mine took 50 mins total. Cut into squares or break into pieces.

Enjoy with your favourite topping or on their own. They'll last in airtight container for a week (but they'll be long gone by then!)


Saturday, February 15, 2014

Oat and Quinoa Blender Pancakes


GF, VG

This week I tried out a new food on my Benny with great success. A friend with coeliac disease suggested Freedom Foods Oats and since she can tolerate them I thought - why not?

Freedom Oats are grown in fields separate from crops containing gluten and they're tested before being sold. Apparently 4 in 5 people with coeliac disease can eat them - I haven't been able to find any research to support this however.  I started with a humble bowl of porridge and that went well. Both my husband and Benny seem to be able to tolerate these oats just fine.  As far as additions to a restricted diet go, this one is pretty huge. Anzac cookies! Home made muesli bars! So many baking opportunities have opened up.

This morning I decided to try out an easy pancake recipe where everything is added to a blender or food processor. I've adapted it from a few recipes I've found online to make it GF and EF. These are light and fluffy and full of good things. There are no refined sugars in them either.


Ingredients

1 C rolled oats (gluten free if you need them to be)
1 C quinoa flakes
1 1/4 C rice or almond milk
1 large ripe banana or 2 small ones
1 Tbsp maple syrup or honey
1/2 tsp cinnamon
pinch salt
1 1/2 tsp baking powder - I like Bob's Red Mill because it's GF and aluminium free
2 tsp chia seeds
1/4 C water

Method

Put the chia seeds in the 1/4 C water and leave to gel for a few minutes. This will be your "egg" and it's a nice way to get some chia into children without them realising it.

In a food processor or blender add all ingredients except the chia and water and blend until combined. Add the chia gel and pulse a few times until combined.

Cook in a hot pan with a little coconut oil or butter if you can eat it. I make these as little mini pikelets rather than big pancakes because they're easier for the kids to eat and fit nicely into their lunch boxes. I serve them without any toppings but they'd be lovely with maple syrup too.

If you can't find quinoa flakes you can use 2 C of rolled oats instead. These would also be yummy with some blueberries, sultanas or choc chips stirred through just before cooking.

Enjoy!

Saturday, February 1, 2014

Gluten Free Vegan Brownies


GF, VG, NF (optional)

The other day I was tempted by a gluten free brownie recipe that popped up on my Facebook newsfeed. It was for peppermint chocolate brownies and since my husband loves a mint and chocolate combo I thought I'd give it a try. Until I looked at the recipe that is. It had no less that three mini recipes in one, and each one required a long list of ingredients. I have a pretty good set up of raw ingredients here including the weird ones like xanthem gum and buckwheat flour but I would still need to spend around $50 to make that brownie. Isn't that ridiculous?

This brownie recipe is so simple, everything is made in a food processor and it has simple ingredients. It's even pretty healthy due to it's secret ingredient... black beans. I know - a bit strange, but if you think about it - they're neutral in taste and they give you that moist binding action that you're missing without eggs and gluten.

Here we go!

Ingredients

1 can of black beans, rinsed and drained
2 flax seed eggs (2.5 Tbsp flaxseed meal and 6 Tbsp water)
3 Tbsp coconut oil or other neutral oil like canola if you can't use coconut
3/4 C cocoa powder - use raw cacao if you can, the higher the quality the better
1/4 tsp sea salt
1 tsp vanilla extract
1/2 C sugar - I used raw
1 1/2 tsp baking powder
Nuts (optional) - I used pecans


Method

Preheat an oven to 175 degrees C or 350 degrees F. Grease a 12 cup muffin tin (not mini muffins, the standard size).

In a food processor add the flaxseed meal and the water and leave to sit for a few minutes to gel. You can use either whole flaxseeds and grind them or you can use ready ground meal.

Add the other ingredients except for the nuts and blend until smooth. Check the consistency and add more water if you need to - it should be thick, but not dry.

Spoon the mixture into the muffin tin and sprinkle with nuts. Cook for 20 minutes, the brownies should be pulling away from the sides of the pans. They will still be fudgey in the centre, which is just how I like them!

Enjoy!

Thanks to Minimalist Baker for the recipe, it's a great site by the way - vegan gluten free recipes without the long list of ingredients!

Thursday, January 30, 2014

Lazy Sushi for School Mornings

My kids love sushi and it works for me because it's naturally GF, filling and nice and healthy. But when I think about making it, it seems way too hard - especially on a school morning. I know, I know, it's not really that hard. But on a school morning it never hurts to make things just that little bit easier - yes?

So this is my lazy sushi. I'm pretty excited about this because it's so fast and my kids love it. When Ben in particular brings home an empty lunch box I'm always happy.

Firstly, the rice. Buy your sushi rice (has to be sushi rice) from an asian supermarket not a normal supermarket. It's much much cheaper that way. I cooked mine in a pressure cooker - 2 C rice with 2 C water for 7 mins on low. Then I mixed in 3 Tbsp of rice wine vinegar (check for GF status) with a fork and left it to cool.  This was enough for two lunches for two kids, with some left over which I froze for next time.

The next thing you'll need is a rice mould. I bought mine for $2.80 from a Japanese shop but I bet there are loads of them online too. If you don't have one you could also just make balls from the rice or try to make the rolls with your hands.


These two halves fit inside a plastic frame  - so you put one half in the frame, fill it to the top with rice (pressing down firmly) then put the other half on top face down and squeeze. The frame slides off and you remove the two halves of the mould to reveal three rolls like this:


Then all I do is cut or rip a piece of nori and wrap it around the outside. I've also seen them with sesame seeds sprinkled over the top but my little guy wasn't so keen on that. The whole thing takes less than a minute.


My daughter likes filling in her sushi and it didn't work too well when I tried to do layer of vegetables in the rice mould. So instead I made her a sushi salad. Just add whatever you like to your sushi rice, rip up some nori and dribble over some GF soy sauce.


There we go - lazy sushi. No rolling, no bamboo mats! Have a great day everyone.

Thursday, October 24, 2013

Vegan Roasted Tomato and Eggplant Stew with Millet (from Veganomicon)

VG, GF


Yesterday the weather was a bit cooler so I decided to use up an eggplant I had in the fridge in the form of a stew. I'm eating a lot of vegan dishes at the moment and really enjoying them. My absolute favourite vegan cookbook is Veganomicon by Isa Chandra Moskowitz. It has everything you need to know about vegan food in it and is great for beginners.

So, back to my stew. After I decided to make it I realised that my cookbook is with a pile of precious things at my husband's work due to the bush fires we've had here recently (see, I told you the cookbook is good - it made it into the "must take" pile!). We evacuated on Wednesday and now we have things scattered about all over the place so that if the fire hits our house we'll still have a few important bits and pieces. Another thing that's been evacuated is my DSLR camera. The pics of this post were taken with my phone, so my apologies. Without my recipe book this is an adaption of the original using other blog posts I found and my memory.

The first step to this stew is roasting some eggplant, garlic and red capsicum on a tray. I heated the oven to 200 degrees C and put 1 eggplant sliced up, two capsicum halved and seeds removed, and some cloves of garlic with the skins on onto the tray. I sprayed a bit of olive oil over everything and popped it into the oven for around 25 mins.


This is it when it came out. Yummo right? Then I put the capsicums into a plastic ziplock bag and sealed it up so that they steamed. This is to make the skins easier to peel off.

While that was happening I sautéed a diced onion in some oil and then when it was turning brown I added 2 cloves of minced garlic.  After that I added 1/2C vegetable stock, 1 tin diced tomatoes, 1 tsp dried oregano, 1/2 tsp paprika, 1 tsp salt. Once that was all happening I added the eggplant, squeezed out the garlic from the skins, and added the peeled and chopped capsicum. The last step was to add a drained tin of chickpeas. You can add a little more water at this stage if it's too thick.

Once it was all mixed up I let it sit for 20 mins off the heat with the lid on while I made the millet. 

Millet is a really yummy GF alternative to couscous. We buy hulled millet from the food co-op and  use it in place of rice or couscous with a casserole or a stew.  You can add flavouring to it or vegetables for a complete meal or have it cold as a salad. It's cooked using the absorption method with a 3:1 ratio of water to millet. Once it's boiling turn the heat down as low as it'll go and place a lid onto the pot. 1C of millet takes me around 20 mins to cook. Check it regularly so that it doesn't catch on the bottom. Once the water has almost absorbed take it off the heat and leave it for another 5 mins or so with the lid on to steam then fluff with a fork.

We served it with a little parsley over the top. 

The kids had the stew and millet and also some beef which I covered in rice milk and then rice crumbs. Even though I'm eating vegan food a lot I still want to give meat to Ben regularly because he's already on such a restricted diet, and he needs the protein.

I got a great deal on some organic beef from Coles, this will do 3 meals for the kids.


Ingredient list:

1 large eggplant
2 red capsicum
olive oil
garlic
1 onion
vegetable stock
1 tin tomatoes
1 tin chickpeas
salt
paprika
oregano
millet, polenta, couscous or rice


Friday, September 27, 2013

Vegan Gluten Free Chocolate Cake with Cashew Cream - Bob's Red Mill Review


GF, EF, DF, VG

When your child is on a restricted diet I think it's important to try to normalise food as best you can. There are so many social activities centred around food - birthday parties, shared lunches, Christmas, Easter and eating out to name a few.  I may not be able to make those things completely normal for Ben (separate Tupperware container full of food anyone?) but I can make food a normal part of life at home.

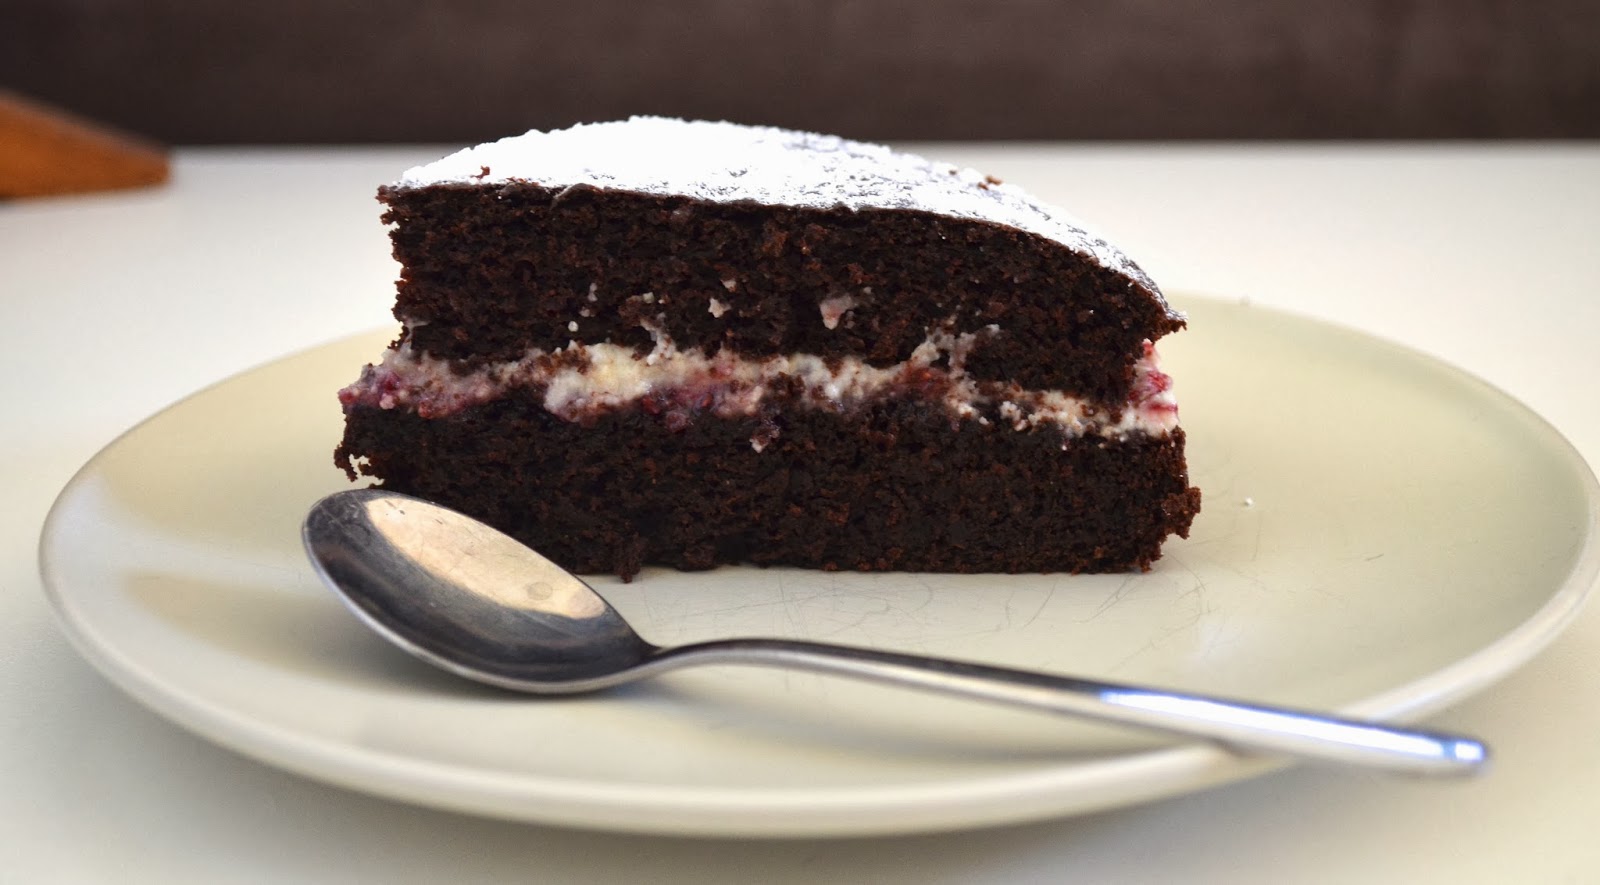
All kids love baking with mum or dad. Gluten free, egg free baking can be tricky to do with kids because precise measurements are usually required - but it's still worth having a go. Today I used a Bob's Red Mill Chocolate Cake mix to make a lovely moist chocolate cake with jam and cashew cream in the middle. Ben did almost all of it himself and was so proud to serve it to his "guests".

Bob's Red Mill products are great quality and don't have a lot of the fillers and starches that cheaper GF products contain. The ingredients in this packet are: Evaporated cane juice sugar, unsweetened cocoa, chickpea flour, potato starch, tapioca starch, whole grain white sorghum flour, broad bean flour, baking soda, xanthan gum, sea salt, cream of tartar. There's nothing too ominous in there at all and it can be handy to have a packet cake on hand when little people are in the mood to bake.


Bob's Red Mill products are pricey in Australia, but there are ways to get a good deal. The website and app Grocery Run has regular Gluten Free days where you can buy 2 Bob's products for the price of one. I wait until Gluten Free day appears and then stock up for a month or two. By doing it this way I get a cake mix like this for around $4.50 each, which isn't bad for gluten free.


In addition to the cake mix we added:

1/4 C canola oil and 1/4 C vegan margarine (recipe suggests 1/2 C butter or margarine)
1 C Bonsoy soy milk
1 Tbsp lemon juice
2 Tbsp ground flaxseed in 6 Tbsp water (left to stand for 2 mins to gel) - this is a replacement for 2 eggs
1/3 C hot water
2 tsp good quality vanilla extract

The mix came together really easily with no lumps. It has a nice smooth rich consistency too.

The cake went into the oven at 190 degrees C or 375 degrees F for around 45 mins. I tested the centre with a bamboo skewer before taking it out.


While we waited for it to cool down Ben got to lick the spoon! Such a simple childhood pleasure that I remember well from baking with my own mum - but something that can be hard for an allergy kid to experience. 

Once it was cool we sliced the cake in half so we had two thinner pieces. Then we spread some nice allergy friendly raspberry jam. We wanted cream, but we're not doing dairy at the moment so we made a cashew cream by blending up 3/4C raw cashews and 3/4C water until smooth. After spreading the cream on top of the jam we popped the top portion of the cake on and sprinkled some icing sugar on top.


The nicest thing about this cake is the texture. It can be hard to get a good crumb on a GF cake and without eggs you run the risk of it being dry. This cake was moist and chocolatey - just like a good choccie cake should be!


I'd definitely use Bob's Red Mill Chocolate Cake again - I think it would be great for a special occasion or for when non allergy guests come for dinner. I'm convinced that no-one would know this cake is GF. 

Enjoy!


Wednesday, September 25, 2013

Raw Vegan Gluten Free Strawberry Tart with Macerated Strawberry Topping

VG, GF

I really love a raw dessert. I find baking tiresome at times so being able to just whip something up and throw it in the fridge is satisfying and rather therapeutic.

This raw vegan strawberry tart is gluten free and full of goodies. It's perfect for a warm spring evening - enjoy!


Base:

3/4 C raw cashews
3/4 C almond meal
1/2 C dates
2 Tbsp white chia seeds
1 Tbsp coconut oil

Blend all ingredients until you reach a rough crumb and press into a greased pie dish


Filling:

250g strawberries hulled
300g organic firm tofu
1 Tbsp coconut oil
1 Tbsp maple syrup
Pinch salt

Blend all ingredients in a food processor until smooth. Pour into base and put in the fridge for at least two hours.


Topping:

250g strawberries hulled
1 tsp lemon juice
1 tsp maple syrup

Combine and leave in a bowl for at least 30 mins so the strawberries macerate. Pour on top of the tart just before serving.


Sunday, September 22, 2013

Gluten Free Vegan Lemon Coconut Cake


GF, EF, DF


Yesterday some gluten free guests from Sydney visited so I thought I'd try out a new recipe. This lemon coconut cake is moist and delicious with a subtle lemon flavour. It's gluten, egg and dairy free and easy to make.

Preheat oven to 180 degrees C.

1 C desiccated coconut
1 C gluten free flour blend (I used 1/4C buckwheat, 1/2C brown rice flour and 1/4C almond meal)
3/4 C raw organic sugar*
2 tsp GF baking powder

1 C coconut cream**
1/2 C soy or rice milk
Juice of two small lemons
Zest of one lemon


* You could use less sugar if you wanted to or replace with 1/2C maple syrup

**The coconut cream I use is the thickened fat that sits on the top, not the water underneath. To help your coconut cream separate in the tin place it in the fridge first.

Mix all dry ingredients together and combine with a whisk. Add the coconut cream, milk, lemon juice and zest and mix well until smooth.

Place in a greased and lined loaf tin and bake for 50 - 60 minutes until cake springs back in the centre.

Enjoy!


Thursday, September 19, 2013

No cheese cheesy bake.

VG, GF

It seems that the older I get, the more intolerant of dairy products I become. It's almost at the point of no return for me now, with even a tablespoon of cows milk in a cup of tea leaving me feeling queasy. For the most part I don't miss it at all because I have a horrible association with it after many nights sweating and feeling incredibly nauseous. The one thing I do miss however, is creaminess.

I've been having a play with nut creams and tofu lately and tonight I made a no cheese cheesy bake. This is gluten free but you could substitute the gluten free pasta with normal wheat pasta if you choose to.


Ingredients

GF pasta shells
1 jar of organic tomato pasta sauce
1 tin of diced tomatoes
1 packet of tofu - try and buy organic because soy beans are a crop that can be exposed to heavy use of pesticides and fertilisers as well as some being genetically engineered.
1 C raw unroasted unsalted cashew nuts
3/4 C - 1 C soy milk (again, try for organic)
2 zucchini's or spinach
Salt and white pepper
Olive oil

Let's Cook!

Cook the pasta in salted boiling water until just cooked. Meanwhile, cut the zucchini into rounds and cook on a tray in the oven with a little olive oil at 180 degrees centigrade for around 15 minutes or until soft.

To prepare the creamy cheesy element of the dish blend the cashew nuts with 3/4 C of the soy milk until smooth. Add the tofu broken into chunks and blend it together until it makes a thick cream, about the consistency of ricotta cheese. Add a little more soy milk if you need to. Season with salt and a pinch of white pepper.


Mix the pasta sauce and tin of tomatoes together in a bowl.

To assemble the dish brush some olive oil in a large rectangular oven proof dish then add a layer of tomato sauce. Add a layer of pasta on top of the sauce then dot 1/2 of the nut tofu cream on top of the pasta evenly. Add another layer of tomato sauce then the zucchini overlapping the pieces as you go. Lastly add the remaining pasta and finish with a final layer of tomato sauce and the remainder of the nut tofu cream.


Cook for 20 minutes in a 180 degree oven (fan bake works best) until golden and bubbling.


You won't taste nuts or tofu, but what you will have is a lovely creamy texture and a healthy no meat protein boost. Even better, my kids loved this meal and didn't miss the meat or cheese at all.

Not Peanut Butter

GF, VG.

Ben used to have a peanut allergy and we're still wary of giving him peanut butter. I'm not a huge fan of peanut butter anyway because peanuts are so acidic and the state of the guts in our family is tenuous at the best of times. That leaves me with almond butter, or sunflower seed butter, and both are pretty expensive.

The other day I was doing the supermarket shop and as I approached the spreads aisle I had a thought. How hard can it be to make a nut or seed butter? Super easy as it turns out.

This morning I made a jar of almond and sunflower seed butter while I was making the kids their breakfast. It takes no time at all and the taste is amazing - nutty, sweet, salty and none of that gluggy oily taste. And have you ever read the ingredients on the back of a peanut butter jar? Some of the things you may find listed are: icing sugar, sugar, mono-diglycerides, and hydrogenated vegetable oils. Making my own means I can use organic seeds and nuts if I choose to, for a fraction of the cost of a store bought organic spread. It also means I can control the amount of salt I use and I can keep it sugar free.

For this batch I used 200g of raw sunflower seeds and a handful of raw almonds with the skin on. When you're buying your nuts and seeds make sure they are unsalted, unroasted, and have no additives.

Place your nuts/seed mix on a tray and bake in the oven for around 15 minutes at 180 degrees Celsius or until golden brown. You'll have to shake the tray every few minutes to stop them burning, and they do catch quite quickly.


Once they're nice and golden let them cool for a bit before blending them up. They'll turn to a powder first and then if you take it a step further the mix will start to form a paste as the oils in the nuts are released. I add a bit of oil to loosen it up, I like to use almond oil. Peanuts are naturally oily but almonds and seeds are less so, so I find it does need a bit of oil to turn it from a paste to a spread. I like mine a bit salty so I also add a small pinch of sea salt.


Once you're happy with the consistency and taste pop it into a jar and refrigerate. Yum!


I hope you'll give this one a try, you'll be surprised at how easy it is to make your own super yummy nut spread.

What the heck is Kombucha?

Have you heard of Kombucha? I hadn't up until about 18 months ago. I had ordered Nourishing Traditions by Sally Fallon and in her book she raved about it.

Part of my challenge with Ben is to not only feed the kid, but also keep his gut in as good a condition as I can manage. Kombucha has many great healing properties and it's loaded with probiotics. I ordered a SCOBY (symbiotic culture of bacteria and yeast) and I haven't looked back.


Kombucha is made from sweet tea that is then fermented by using a SCOBY. The SCOBY eats the sugar in the tea creating a tangy and fizzy drink that's, well, yum. Before I tried my first bottle of Kombucha I had read a bit about it, and I wasn't expecting it to taste so good. The best description I can give is a crisp apple cider with the taste of stone fruits.


So what exactly is a SCOBY? It's a weird looking pancake like jellish thing that floats in your jar of tea. It's odd. In Kombucha circles (yes, there are some) the SCOBY is called the mother and when a white layer forms on the mother, it's called the baby. I told my husband that and he gave me a look that said, let's just call it a SCOBY- Ok?

You can buy a SCOBY and some starter tea from health stores and from eBay. I bought mine for just under $13 including postage from eBay and it arrived in great condition with lots of instructions to get me started.


So why drink it? Apart from the taste, Kombucha has incredible health benefits. The tea has lots of goodies in it like probiotics, it contains lactic and gluconic acid, and a range of B vitamins. Lactic acid helps with digestion and gluconic acid can help with yeast infections and liver detox. Kombucha lovers report benefits in aiding acid reflux, constipation, and weight loss.

How do you make it? My recipe is very simple.

Take 1L of water and bring it to the boil, remove from the heat and add 2 black tea bags, or for flavoured tea use 1 black tea bag and 1 flavoured tea bag. I've had success with pomegranate, strawberry, blackberry, rooibos tea and orange & ginger.

Brew for 15 minutes (longer if you like it stronger), and add 1/4C of white cane sugar.

Stir to dissolve the sugar, remove the tea bags, and wait until it's cooled down to luke warm.

Add 100ml of starter tea (that comes with your SCOBY when you buy, and then you save 100ml of each batch to use next time).

Poor into a clean big glass jar (make sure it's big enough to hold all the liquid) and slide in the SCOBY.

Cover with a breathable cloth like a hanky or a cheesecloth and attach a rubber band around the rim.

Place in a cool dark place for 7 days to ferment.

After 7 days pour off a bit of the liquid and taste it, if it's still sweet then leave it another day and try again - it should be pleasantly tangy and fresh but not like vinegar.

Bottle it into clean bottles and leave for 3 days to carbonate. Plastic is good because you can tell when it's carbonated - the bottles are hard.

Place into the fridge and consumer within a month.

Is it safe? Now as with any food product, especially fermented food, you do need to be careful with hygiene. I always wash my hands and sterilise my glass jars in boiling water before I start. I also did my research before I started both online and by reading through the detailed instructions my eBay seller provided. If you have a go at googling Kombucha you'll no doubt find a few scary websites talking about Kombucha and people getting sick etc. There are also people all over the world who have been making Kombucha tea for generations, and in much dirtier conditions than our kitchens. I take an educated and common sense approach when fermenting foods.

I don't think there is any good reason why we can't make and enjoy these products at home (and I'm a bit cynical about the blogs who say never to make your own Kombucha and then magically have a commercial brand endorsed as part of their blog post - ahem).

I suggest you do your own research if you're concerned. I'm not a doctor or a nutritionist. There's lots of info out there - far too much for me to write out here.

One thing I do want to mention is that some people have reported a 'cleansing crisis' or a 'healing crisis' in the first few days which is basically the intestines have a bit of a freak out at all the good bacteria. Symptoms are a gurgling tummy, diarrhea, and tiredness. You can help that if it happens by drinking less tea more often - so lots of frequent sips, and by drinking a lot of water. It should sort itself out pretty quickly.

Is it alcoholic? It is slightly. About 1%. You'd need to drink a lot of it to get drunk - and I don't recommend that because it would be way too much for your tum.

So there we go, Kombucha Tea! My kids absolutely love it. Their favourite flavours are pomegranate and ginger & lemon.

Vegan Mayonnaise

VG, GF.


Ooooh baby! I'm pretty excited about this one. Up until about 3 weeks ago Ben could tolerate a bit of cheese in his diet. I relied on it for school lunches as a "glue" to hold a white corn quesadilla together, or on top of a GF mini pizza. Things were swimming along and then in early September we all came down with the most aggressive stomach virus I've ever encountered. One unfortunate effect of that was that Ben can no longer tolerate dairy.

I'd heard about Vegenaise and Gwyneth raves about it in her book It's All Good. Could I find it here in Australia? No, I could not. As it turns out, vegan mayonnaise is actually easy to make. I used a recipe I adapted from Vegan Epicurean:

1/2 C soy milk (preferably unsweetened and not vanilla!)
1 C plus 2 Tbsp canola oil
1/4 tsp apple cider vinegar
1/4 tsp agave nectar
1/8 tsp dry mustard powder
3/4 tsp sea salt
1 Tbsp lemon juice
Zest of 1 lemon
Black pepper to taste

Put everything except the oil in a blender and give it a couple of pulses. Slowly add the oil while pulsing gently until it emulsifies and comes together in a nice thick mayonnaisy kind of way. The original recipe says to add everything and blend, but mine didn't thicken this way. It's important not to go crazy with the blender - gently, gently does it.

The taste? I like it. My first batch was a little too sweet for my taste so I would add less agave next time and more lemon. I can't wait to use this in a potato salad, on toast, or in a pasta salad. Enjoy!

Coconut and Chia Breakfast Puddings

GF, VG.

Breakfast is a tough one in our house. My Ben just doesn't feel like eating when he gets up. Gone are the pre-school days when he could nibble for a couple of hours until his gut was ready to accept a meal. Now that he's at school it's my every-morning battle to get a decent breakfast into him. I needed something easy to eat, not too strong in flavour and really filling in small quantities. These Breakfast Puddings were a hit. They're fantastic to eat when you're in a rush or for soothing sensitive tummys.


These Coconut Chia Breakfast Puddings have the consistency of a rice pudding. They're sweet but not too sweet, and the chia seeds make them really filling. Here's how I make them:


400ml Coconut milk or other dairy free milk
1/2 C Chia seeds (white)
1/2 C Frozen berries
1 tsp Good quality vanilla extract
1 tsp agave or maple syrup (optional)

Mix all ingredients together and pour into glasses. Place in the fridge for at least 30 mins or overnight to set. 


My Bombproof Vegan Gluten Free Chocolate Cake

GF, VG.


I've made this cake for years and she's never let me down. It's simple to make and has no gluten, dairy, egg or nuts. It also has a moist consistency and a really chocolatey flavour. Add some icing and GF sprinkles and you have yourself a birthday cake.

Preheat the oven to 175 degrees centigrade.

190g gluten free flour - I use a blend of 100g brown rice flour, 50g sorghum, and 40g tapioca starch
200g raw sugar
20g raw cacao powder or cocoa powder
5g baking soda (bicarb)
3g salt

Whisk all dry ingredients together.

In another bowl mix together:

80ml neutral oil
5ml white vinegar
235ml warm water

Combine wet and dry ingredients and mix until smooth. Pour into a greased and lined tin and bake for 45 mins or until the cake springs back.