Sunday, September 29, 2013

20 Allergy Friendly Lunch box Ideas


Without a doubt the hardest aspect of this whole allergy business is packing a school lunch. When we're in our own environment and I'm buying and preparing the food it's easy to feel pretty normal. It's only when we venture out that reality hits.

Making an allergy friendly lunch box 5 days a week can be really hard work when you can't use sandwiches or bread rolls. GF baking needs to be fresh - which is why you can often find me bending over a bowl of muffin mix at 7am on a school morning. I want Ben's lunches to be interesting, yummy, satisfying and full of nutrients - and the key to this is all in the planning.

Here's a list of 20 allergy friendly lunch ideas made up of things I've successfully tried over the years. If you have some ideas of your own I'd love to hear them in the comments section - let's keep this list a work in progress!
  1. White corn GF tortillas sandwiched together and crisped up in a dry frying pan (like a quesadilla) with fillings inside. Fillings we like are: salmon and cheese (if we're eating cheese); baked beans; Mighty Mite (GF marmite) and cheese; tuna and vegan mayonnaise.
  2. GF mini pizzas with either vegetarian toppings or salami. I make a big pizza and cut it into smaller portions to freeze. Hummus is great in place of cheese.
  3. Meatballs - either organic beef or chicken using soy milk and GF breadcrumbs to bind
  4. Chicken drumsticks
  5. Sushi - watch for GF rice wine vinegar and use GF soy sauce
  6. GF mini muffins - make a basic muffin mix and alternate with sweet and savoury additions
  7. Pasta salad - GF pasta spirals, vegan mayonnaise, cucumber, cherry tomatoes, salmon
  8. Potato salad - Vegan mayonnaise, leftover roast potatoes, chopped herbs
  9. Apple slices with nut butter - Sliced apples spread with nut or seed butter and sprinkled with raisins
  10. Fruit salad - with yoghurt (dairy, sheep, goat or coconut) and sprinkled with ground seed mix
  11. Hummus and rice crackers 
  12. Toasted GF bread with seed butter
  13. Leftovers GF pasta and sauce in a Thermos
  14. Asian style rice noodles and vegetables
  15. GF cheese scones - make DF by omitting cheese and adding flavour enhancers like chopped sundried tomatoes or roasted capsicum instead
  16. GF pumpkin scones - using cold mashed pumpkin as a binder
  17. Potato cakes
  18. Corn fritters
  19. Roast vegetable salad with lemon juice and olive oil dressing
  20. Tapioca or chia puddings - For Chia Puddings see the recipe here
Tips for easy lunch-making:
  • Invest in some good lunch packaging - small containers with no leak lids are great
  • Make in bulk and freeze individual portions
  • Buy a good quality Thermos
  • Think about how to keep high risk foods like meat or sushi cold, especially in the summer months. Ice packs and insulated lunch bags are one idea - or see if you can access a fridge at school for your child
  • Plan ahead - with allergy lunch boxes improvisation is not your friend

Friday, September 27, 2013

Vegan Gluten Free Chocolate Cake with Cashew Cream - Bob's Red Mill Review


GF, EF, DF, VG

When your child is on a restricted diet I think it's important to try to normalise food as best you can. There are so many social activities centred around food - birthday parties, shared lunches, Christmas, Easter and eating out to name a few.  I may not be able to make those things completely normal for Ben (separate Tupperware container full of food anyone?) but I can make food a normal part of life at home.

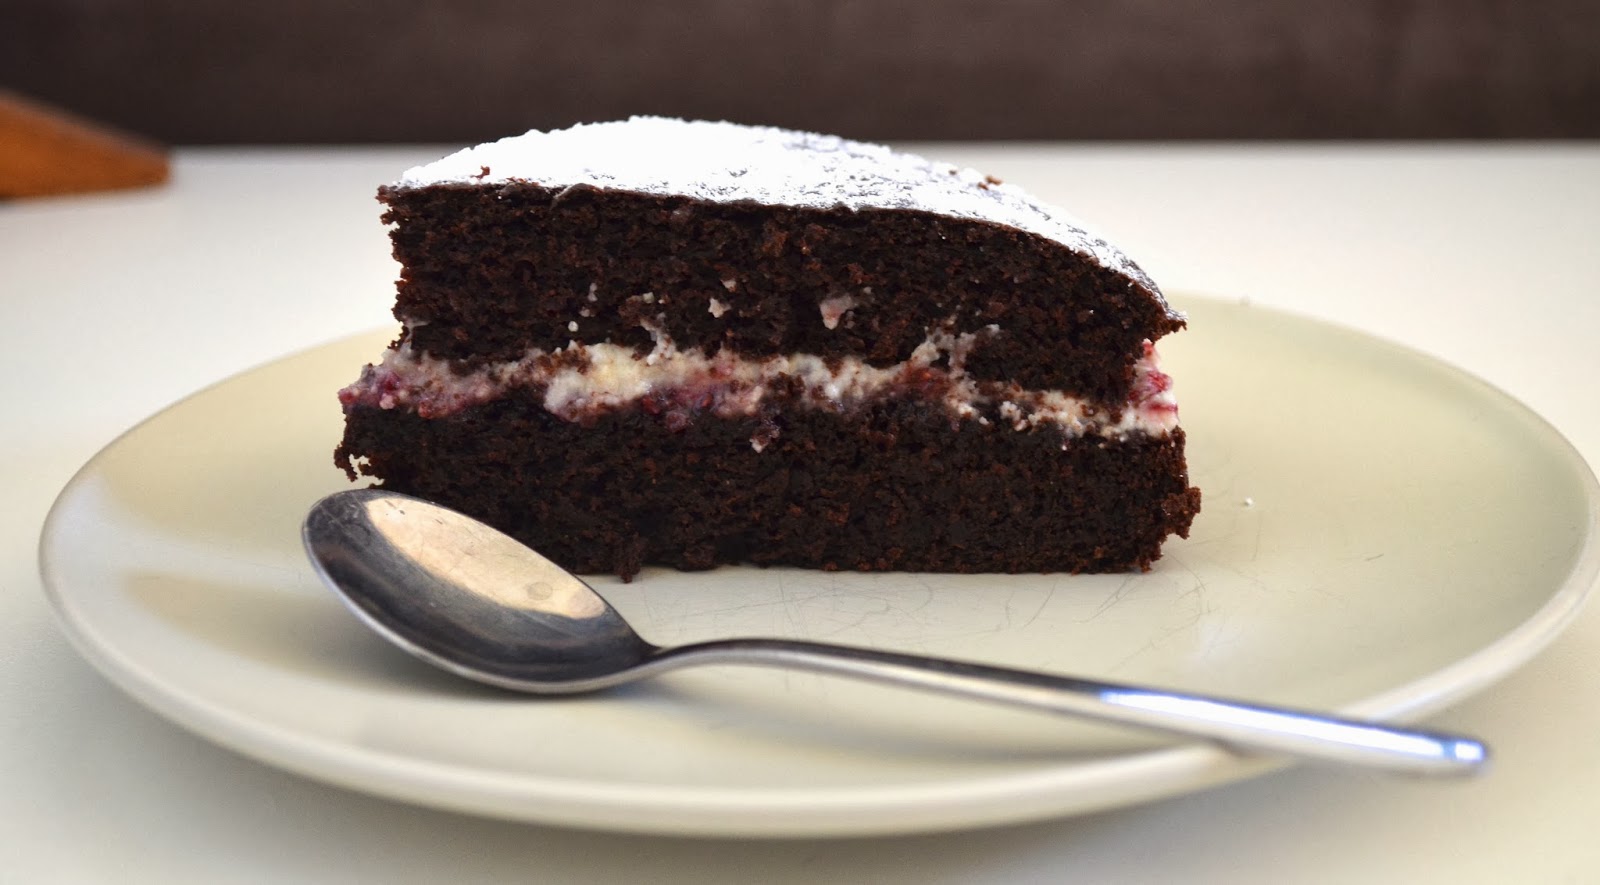
All kids love baking with mum or dad. Gluten free, egg free baking can be tricky to do with kids because precise measurements are usually required - but it's still worth having a go. Today I used a Bob's Red Mill Chocolate Cake mix to make a lovely moist chocolate cake with jam and cashew cream in the middle. Ben did almost all of it himself and was so proud to serve it to his "guests".

Bob's Red Mill products are great quality and don't have a lot of the fillers and starches that cheaper GF products contain. The ingredients in this packet are: Evaporated cane juice sugar, unsweetened cocoa, chickpea flour, potato starch, tapioca starch, whole grain white sorghum flour, broad bean flour, baking soda, xanthan gum, sea salt, cream of tartar. There's nothing too ominous in there at all and it can be handy to have a packet cake on hand when little people are in the mood to bake.


Bob's Red Mill products are pricey in Australia, but there are ways to get a good deal. The website and app Grocery Run has regular Gluten Free days where you can buy 2 Bob's products for the price of one. I wait until Gluten Free day appears and then stock up for a month or two. By doing it this way I get a cake mix like this for around $4.50 each, which isn't bad for gluten free.


In addition to the cake mix we added:

1/4 C canola oil and 1/4 C vegan margarine (recipe suggests 1/2 C butter or margarine)
1 C Bonsoy soy milk
1 Tbsp lemon juice
2 Tbsp ground flaxseed in 6 Tbsp water (left to stand for 2 mins to gel) - this is a replacement for 2 eggs
1/3 C hot water
2 tsp good quality vanilla extract

The mix came together really easily with no lumps. It has a nice smooth rich consistency too.

The cake went into the oven at 190 degrees C or 375 degrees F for around 45 mins. I tested the centre with a bamboo skewer before taking it out.


While we waited for it to cool down Ben got to lick the spoon! Such a simple childhood pleasure that I remember well from baking with my own mum - but something that can be hard for an allergy kid to experience. 

Once it was cool we sliced the cake in half so we had two thinner pieces. Then we spread some nice allergy friendly raspberry jam. We wanted cream, but we're not doing dairy at the moment so we made a cashew cream by blending up 3/4C raw cashews and 3/4C water until smooth. After spreading the cream on top of the jam we popped the top portion of the cake on and sprinkled some icing sugar on top.


The nicest thing about this cake is the texture. It can be hard to get a good crumb on a GF cake and without eggs you run the risk of it being dry. This cake was moist and chocolatey - just like a good choccie cake should be!


I'd definitely use Bob's Red Mill Chocolate Cake again - I think it would be great for a special occasion or for when non allergy guests come for dinner. I'm convinced that no-one would know this cake is GF. 

Enjoy!


Wednesday, September 25, 2013

Raw Vegan Gluten Free Strawberry Tart with Macerated Strawberry Topping

VG, GF

I really love a raw dessert. I find baking tiresome at times so being able to just whip something up and throw it in the fridge is satisfying and rather therapeutic.

This raw vegan strawberry tart is gluten free and full of goodies. It's perfect for a warm spring evening - enjoy!


Base:

3/4 C raw cashews
3/4 C almond meal
1/2 C dates
2 Tbsp white chia seeds
1 Tbsp coconut oil

Blend all ingredients until you reach a rough crumb and press into a greased pie dish


Filling:

250g strawberries hulled
300g organic firm tofu
1 Tbsp coconut oil
1 Tbsp maple syrup
Pinch salt

Blend all ingredients in a food processor until smooth. Pour into base and put in the fridge for at least two hours.


Topping:

250g strawberries hulled
1 tsp lemon juice
1 tsp maple syrup

Combine and leave in a bowl for at least 30 mins so the strawberries macerate. Pour on top of the tart just before serving.


Sunday, September 22, 2013

Gluten Free Vegan Lemon Coconut Cake


GF, EF, DF


Yesterday some gluten free guests from Sydney visited so I thought I'd try out a new recipe. This lemon coconut cake is moist and delicious with a subtle lemon flavour. It's gluten, egg and dairy free and easy to make.

Preheat oven to 180 degrees C.

1 C desiccated coconut
1 C gluten free flour blend (I used 1/4C buckwheat, 1/2C brown rice flour and 1/4C almond meal)
3/4 C raw organic sugar*
2 tsp GF baking powder

1 C coconut cream**
1/2 C soy or rice milk
Juice of two small lemons
Zest of one lemon


* You could use less sugar if you wanted to or replace with 1/2C maple syrup

**The coconut cream I use is the thickened fat that sits on the top, not the water underneath. To help your coconut cream separate in the tin place it in the fridge first.

Mix all dry ingredients together and combine with a whisk. Add the coconut cream, milk, lemon juice and zest and mix well until smooth.

Place in a greased and lined loaf tin and bake for 50 - 60 minutes until cake springs back in the centre.

Enjoy!


Thursday, September 19, 2013

No cheese cheesy bake.

VG, GF

It seems that the older I get, the more intolerant of dairy products I become. It's almost at the point of no return for me now, with even a tablespoon of cows milk in a cup of tea leaving me feeling queasy. For the most part I don't miss it at all because I have a horrible association with it after many nights sweating and feeling incredibly nauseous. The one thing I do miss however, is creaminess.

I've been having a play with nut creams and tofu lately and tonight I made a no cheese cheesy bake. This is gluten free but you could substitute the gluten free pasta with normal wheat pasta if you choose to.


Ingredients

GF pasta shells
1 jar of organic tomato pasta sauce
1 tin of diced tomatoes
1 packet of tofu - try and buy organic because soy beans are a crop that can be exposed to heavy use of pesticides and fertilisers as well as some being genetically engineered.
1 C raw unroasted unsalted cashew nuts
3/4 C - 1 C soy milk (again, try for organic)
2 zucchini's or spinach
Salt and white pepper
Olive oil

Let's Cook!

Cook the pasta in salted boiling water until just cooked. Meanwhile, cut the zucchini into rounds and cook on a tray in the oven with a little olive oil at 180 degrees centigrade for around 15 minutes or until soft.

To prepare the creamy cheesy element of the dish blend the cashew nuts with 3/4 C of the soy milk until smooth. Add the tofu broken into chunks and blend it together until it makes a thick cream, about the consistency of ricotta cheese. Add a little more soy milk if you need to. Season with salt and a pinch of white pepper.


Mix the pasta sauce and tin of tomatoes together in a bowl.

To assemble the dish brush some olive oil in a large rectangular oven proof dish then add a layer of tomato sauce. Add a layer of pasta on top of the sauce then dot 1/2 of the nut tofu cream on top of the pasta evenly. Add another layer of tomato sauce then the zucchini overlapping the pieces as you go. Lastly add the remaining pasta and finish with a final layer of tomato sauce and the remainder of the nut tofu cream.


Cook for 20 minutes in a 180 degree oven (fan bake works best) until golden and bubbling.


You won't taste nuts or tofu, but what you will have is a lovely creamy texture and a healthy no meat protein boost. Even better, my kids loved this meal and didn't miss the meat or cheese at all.

Not Peanut Butter

GF, VG.

Ben used to have a peanut allergy and we're still wary of giving him peanut butter. I'm not a huge fan of peanut butter anyway because peanuts are so acidic and the state of the guts in our family is tenuous at the best of times. That leaves me with almond butter, or sunflower seed butter, and both are pretty expensive.

The other day I was doing the supermarket shop and as I approached the spreads aisle I had a thought. How hard can it be to make a nut or seed butter? Super easy as it turns out.

This morning I made a jar of almond and sunflower seed butter while I was making the kids their breakfast. It takes no time at all and the taste is amazing - nutty, sweet, salty and none of that gluggy oily taste. And have you ever read the ingredients on the back of a peanut butter jar? Some of the things you may find listed are: icing sugar, sugar, mono-diglycerides, and hydrogenated vegetable oils. Making my own means I can use organic seeds and nuts if I choose to, for a fraction of the cost of a store bought organic spread. It also means I can control the amount of salt I use and I can keep it sugar free.

For this batch I used 200g of raw sunflower seeds and a handful of raw almonds with the skin on. When you're buying your nuts and seeds make sure they are unsalted, unroasted, and have no additives.

Place your nuts/seed mix on a tray and bake in the oven for around 15 minutes at 180 degrees Celsius or until golden brown. You'll have to shake the tray every few minutes to stop them burning, and they do catch quite quickly.


Once they're nice and golden let them cool for a bit before blending them up. They'll turn to a powder first and then if you take it a step further the mix will start to form a paste as the oils in the nuts are released. I add a bit of oil to loosen it up, I like to use almond oil. Peanuts are naturally oily but almonds and seeds are less so, so I find it does need a bit of oil to turn it from a paste to a spread. I like mine a bit salty so I also add a small pinch of sea salt.


Once you're happy with the consistency and taste pop it into a jar and refrigerate. Yum!


I hope you'll give this one a try, you'll be surprised at how easy it is to make your own super yummy nut spread.

What the heck is Kombucha?

Have you heard of Kombucha? I hadn't up until about 18 months ago. I had ordered Nourishing Traditions by Sally Fallon and in her book she raved about it.

Part of my challenge with Ben is to not only feed the kid, but also keep his gut in as good a condition as I can manage. Kombucha has many great healing properties and it's loaded with probiotics. I ordered a SCOBY (symbiotic culture of bacteria and yeast) and I haven't looked back.


Kombucha is made from sweet tea that is then fermented by using a SCOBY. The SCOBY eats the sugar in the tea creating a tangy and fizzy drink that's, well, yum. Before I tried my first bottle of Kombucha I had read a bit about it, and I wasn't expecting it to taste so good. The best description I can give is a crisp apple cider with the taste of stone fruits.


So what exactly is a SCOBY? It's a weird looking pancake like jellish thing that floats in your jar of tea. It's odd. In Kombucha circles (yes, there are some) the SCOBY is called the mother and when a white layer forms on the mother, it's called the baby. I told my husband that and he gave me a look that said, let's just call it a SCOBY- Ok?

You can buy a SCOBY and some starter tea from health stores and from eBay. I bought mine for just under $13 including postage from eBay and it arrived in great condition with lots of instructions to get me started.


So why drink it? Apart from the taste, Kombucha has incredible health benefits. The tea has lots of goodies in it like probiotics, it contains lactic and gluconic acid, and a range of B vitamins. Lactic acid helps with digestion and gluconic acid can help with yeast infections and liver detox. Kombucha lovers report benefits in aiding acid reflux, constipation, and weight loss.

How do you make it? My recipe is very simple.

Take 1L of water and bring it to the boil, remove from the heat and add 2 black tea bags, or for flavoured tea use 1 black tea bag and 1 flavoured tea bag. I've had success with pomegranate, strawberry, blackberry, rooibos tea and orange & ginger.

Brew for 15 minutes (longer if you like it stronger), and add 1/4C of white cane sugar.

Stir to dissolve the sugar, remove the tea bags, and wait until it's cooled down to luke warm.

Add 100ml of starter tea (that comes with your SCOBY when you buy, and then you save 100ml of each batch to use next time).

Poor into a clean big glass jar (make sure it's big enough to hold all the liquid) and slide in the SCOBY.

Cover with a breathable cloth like a hanky or a cheesecloth and attach a rubber band around the rim.

Place in a cool dark place for 7 days to ferment.

After 7 days pour off a bit of the liquid and taste it, if it's still sweet then leave it another day and try again - it should be pleasantly tangy and fresh but not like vinegar.

Bottle it into clean bottles and leave for 3 days to carbonate. Plastic is good because you can tell when it's carbonated - the bottles are hard.

Place into the fridge and consumer within a month.

Is it safe? Now as with any food product, especially fermented food, you do need to be careful with hygiene. I always wash my hands and sterilise my glass jars in boiling water before I start. I also did my research before I started both online and by reading through the detailed instructions my eBay seller provided. If you have a go at googling Kombucha you'll no doubt find a few scary websites talking about Kombucha and people getting sick etc. There are also people all over the world who have been making Kombucha tea for generations, and in much dirtier conditions than our kitchens. I take an educated and common sense approach when fermenting foods.

I don't think there is any good reason why we can't make and enjoy these products at home (and I'm a bit cynical about the blogs who say never to make your own Kombucha and then magically have a commercial brand endorsed as part of their blog post - ahem).

I suggest you do your own research if you're concerned. I'm not a doctor or a nutritionist. There's lots of info out there - far too much for me to write out here.

One thing I do want to mention is that some people have reported a 'cleansing crisis' or a 'healing crisis' in the first few days which is basically the intestines have a bit of a freak out at all the good bacteria. Symptoms are a gurgling tummy, diarrhea, and tiredness. You can help that if it happens by drinking less tea more often - so lots of frequent sips, and by drinking a lot of water. It should sort itself out pretty quickly.

Is it alcoholic? It is slightly. About 1%. You'd need to drink a lot of it to get drunk - and I don't recommend that because it would be way too much for your tum.

So there we go, Kombucha Tea! My kids absolutely love it. Their favourite flavours are pomegranate and ginger & lemon.